Abundant Health

Up to date health information tailored for you

  • Home
  • Blog
  • Recipes
  • Shop
  • Contact
You are here: Home / 2021 / Archives for March 2021

Archives for March 2021

Six Tips to Set Boundaries

March 28, 2021 by Dr. Cesar Vasconcellos de Souza - [rt_reading_time label="Reading Time:" postfix="minutes" postfix_singular="minute"]

Como colocar limites?

Do you have a hard time setting boundaries? Do you usually say yes when you wanted to say no? You tackle things that you were not supposed to deal with? If so, then today’s topic is for you. Let’s get some tips that can help you set some boundaries.

Six Tips to Set Boundaries

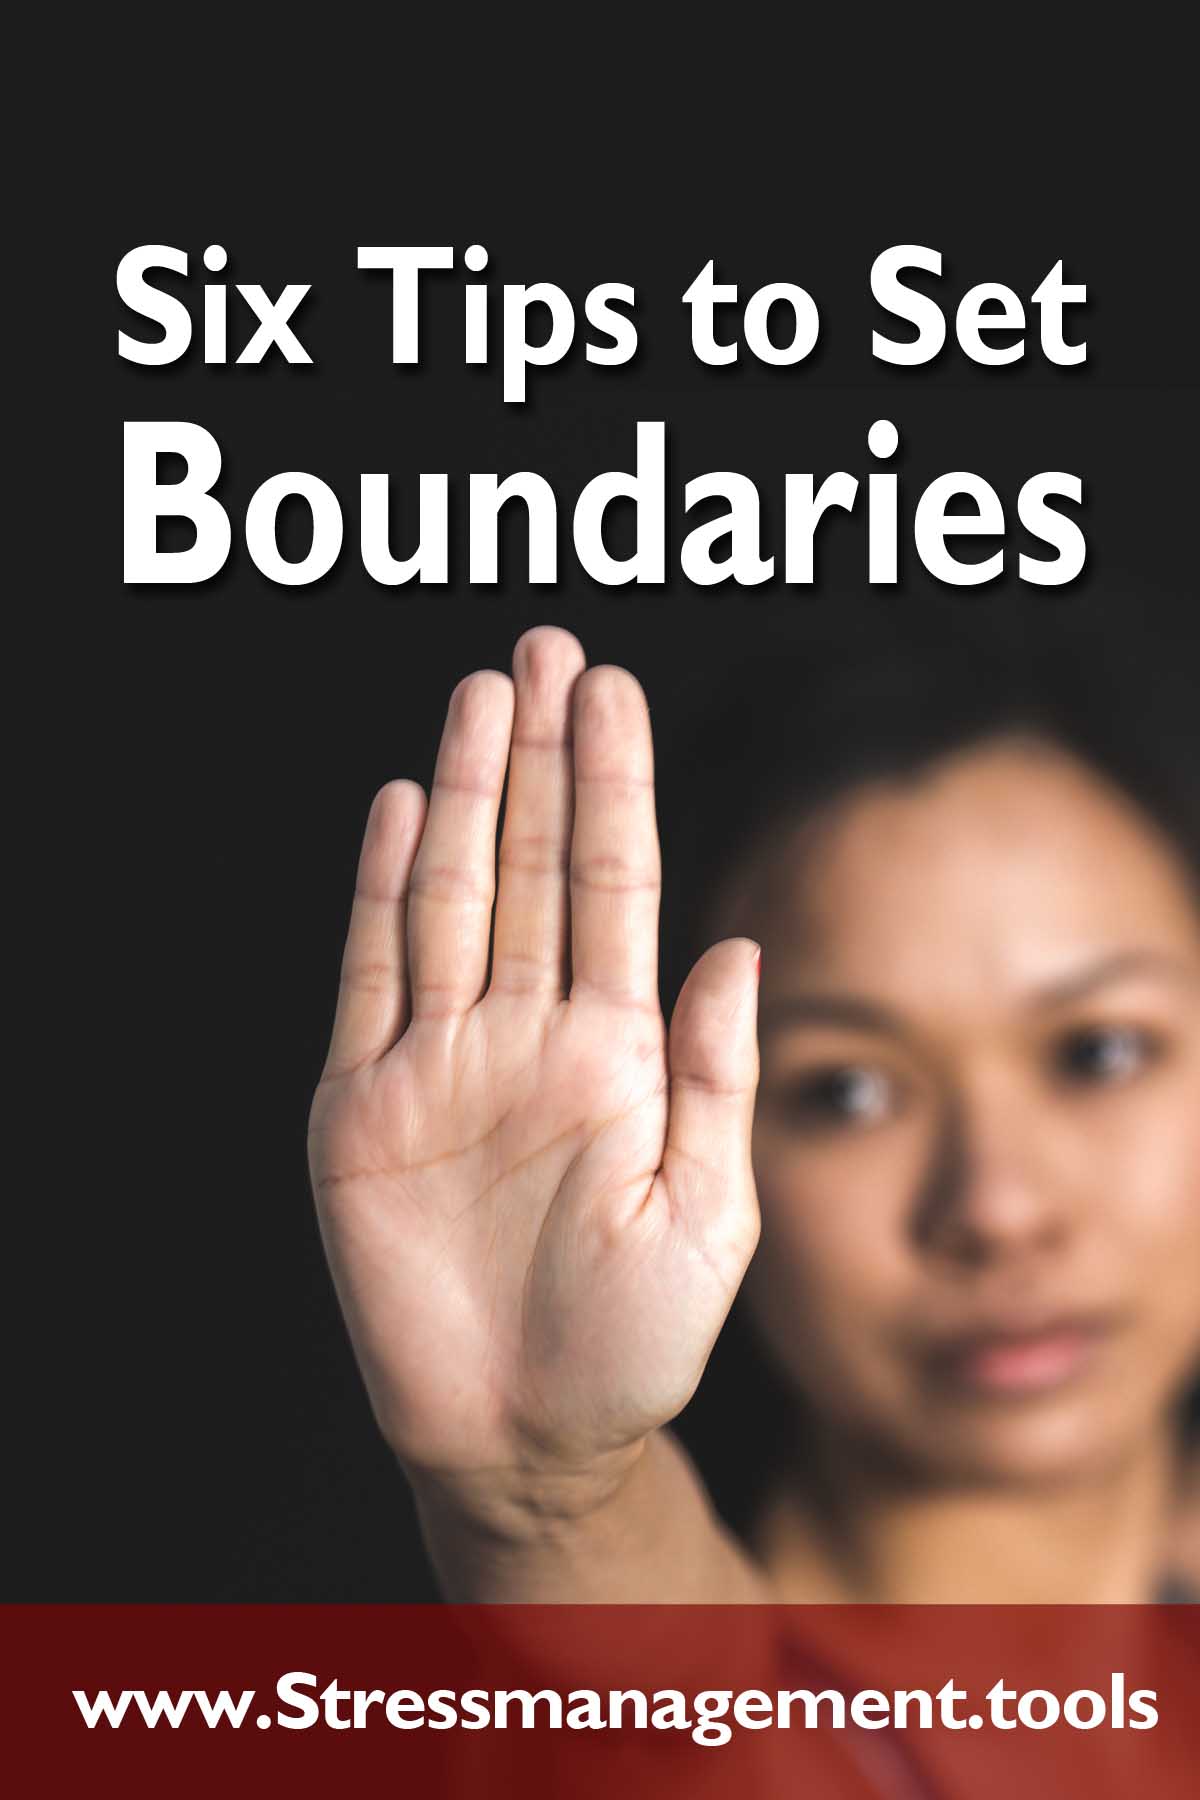
The Importance of Boundaries

You may ask: Why is it important to set Boundaries?

First, because you may be a person who didn’t know how to do this since you were a child. You may have been a victim of other abusive, dominating children, or you suffered from adults who were not sensitive to your needs as a child, needs that you did not know how to claim. Father and mother need to teach children from an early age to know how to defend themselves from abuse. You may have become an adult who still struggles with the issue of setting limits. Hence you suffer unnecessarily, assuming tasks, responsibilities that you shouldn’t have, but since you take them on, your life gets stressful, heavy and unhappy.

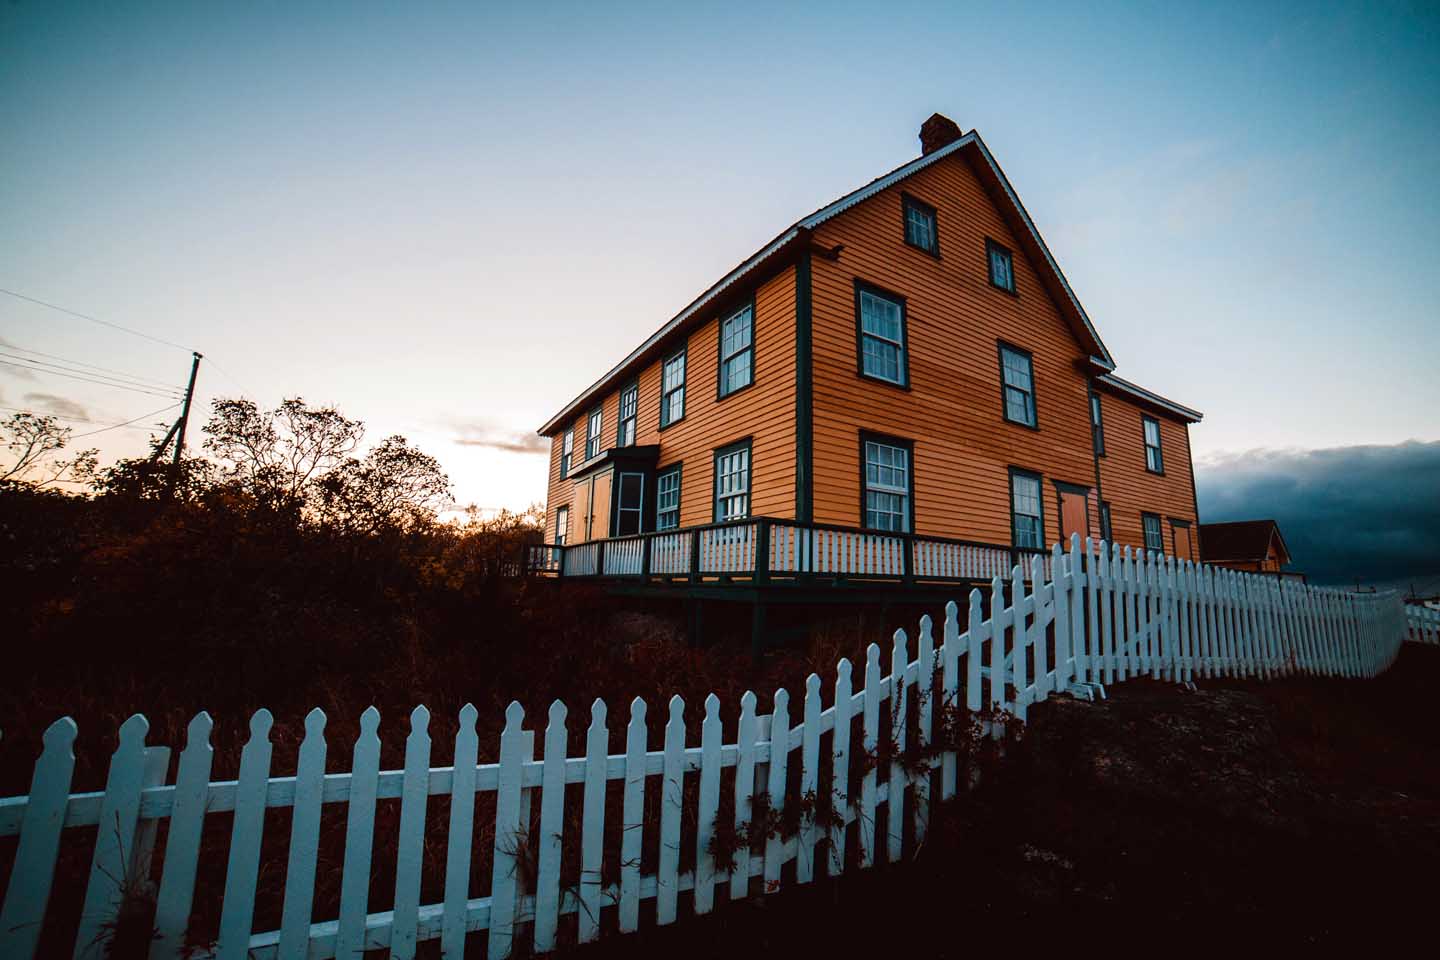
Boundaries are attitudes you should have and need to practice, in order to protect what is good in your life, and not allow bad things to overcome you, whether in your home, your body, at work, in your religious community, in the neighborhood and in your own mind. Limits are important. Think of the boundary between your house or apartment and the neighbor’s house or apartment. The limit can be the door, the corridor, the sidewalk, the wall, the fence, right? And what about the limits between a town and another town, between a state and another state, between one country and another country. Look how important limits are, the border is important, isn’t it? I remember a saying I read a while ago: having a neighbor is good, but put up your fence.

The fence defining the property boundary of the house

An emotionally sensitive person, if he suffered a lot in childhood relationships, he may have built up tight boundaries on his personality, in order to avoid suffering pain again. Sometimes we hide ourselves to protect from the pains we have experienced in the childhood past, to make sure they are not repeated in adulthood. But we can exaggerate our boundaries that keep us away from more intimate contact with others, and even with ourselves.

Some children may not have learned to put limits during childhood against family abuse. They may have been criticized for wanting to be alone for a few moments when it was normal for their temperament. They may have been hampered in the process of delineating their self, in the construction of an identity that separates them from others. They may have had difficulty making decisions independently. Some children and teens may have suffered in their families for being aggressively repressed when they tried to complain about something unjust and cruel. Children who grow up without having learned to set just and necessary limits for the preservation of their own identity, become adults who are generally victims of abuse in marriage, with an authoritarian husband, with an authoritarian wife, or with a co-worker, boss, or abusive business partner.

Practical Tips

Now let’s look at some tips on how to establish healthy boundaries.

First make sure you express yourself clearly. Many sensitive people, more prone to not knowing how to set boundaries, often express themselves, but not in a clear and firm way. They may say something like this: yes maybe, I’ll try, if I can, when they really wanted to say no. You can be clear, firm, and at the same time polite and tactful.

A woman shrugging her shoulders, not saying what she thinks - Photo by Polina Zimmerman from Pexels

A second tip: you have no obligation of always needing to give a reason for your decision. Think about it: you can say no thanks, I don’t want that, and that’s it. Speak politely, without shouting, and if the person insists on wanting to know the reason for your decision, you can repeat your answer and say that you do not want to explain. You have the right not to explain yourself to an abusive person, who just wants to bog you down.

The third tip on setting boundaries. Only you know whether or not you are overwhelmed. If people know that you are overwhelmed, they may not ask you for another difficult task. So say you have a lot to do or too many responsibilities around your ears.

A fourth tip: You have the right to tell a person that you will need more time to think about the decision he wants you to take right away. If you feel not safe to take the final decision right now, say that you need to think and that you will get back to them as soon as you can.

The fifth tip for you to set boundaries and protect yourself. If you think it will be easier to say no by email, by phone, by the message on your cell phone or other means, without being face to face, then use one of these means of contacting the person.

The sixth tip has to do with respecting yourself and thinking that you are on same ground with another person, or you may even be better prepared, for example to perform a certain task. Someone who is bossy, with a dominant temperament, usually chooses the best seat, the quietest place, the largest office, dictates the rules, determines tasks, doesn’t he? So do not feel or place yourself as inferior to that person, but with the same rights if you are actually in the same hierarchy. If the person doesn’t see you as someone who has the same rights as he does, when in fact you have a right, see what you can do to change that.

Make an effort to say no when it is the right thing to do. When you arrive at the final judgment, God will not ask you why you were not the same as someone else. If you don’t take better care of yourself, putting boundaries on what God expects you to be, he will ask you why you have not been the best of yourself. So think about it. You have a right to set boundaries, and if you have not learned it in childhood, you can learn it now. Protect yourself and set boundaries!

Do you need a guide to help you understand how to cope with Stress in an all inclusive approach? Learn how to combat stress, mentally, physically, emotionally and strategically in your life.

Get Me the Guide

Filed Under: Stress Management

Breastfeeding – The Best Start into Life

March 21, 2021 by Esther Neumann - [rt_reading_time label="Reading Time:" postfix="minutes" postfix_singular="minute"]

Breastfeeding - The Best Start into Life

Breast milk makes smart! On average, breastfed children have an intelligence quotient that is three points higher. Breast-fed children are less likely to suffer from allergies. The close contact with the mother gives the baby a feeling of security. The nutritional composition of breast milk is optimally tailored to the newborn. Breast milk is always sterile and at the right temperature. These are all advantages that far make up for the little effort involved in starting breastfeeding.

Breastfeeding - The Best Start into Life

91% of all expectant mothers want to breastfeed. But only about 45% breastfeed for four months, and only 13% for the entire recommended six-month period. Breast milk is the best food in the first year of life. Its composition is precisely adapted to the infant’s need for water, energy and nutrients. In addition, it is always sterile and always at the right temperature.

The intensive skin and body contact stimulates the senses. The baby sees, feels, smells, hears and tastes the mother. Sucking strengthens the jaw muscles, which is beneficial for the later chewing capabilities and language development.

Breast Milk and Cow’s Milk Compared

Compared to cow’s milk, mature breast milk has much less calcium and less casein. That makes sense. A small calf doubles its birth weight much faster than a human being. That is why the calf needs more calcium for bone formation. But breast milk has more available carbohydrates in the form of lactose, which is the infant’s most important energy source. Various carbohydrate fractions also act as growth factors to promote the proliferation of bifidobacteria, which protect the intestines of the newborn from pathogenic germs and parasites.

The proportion of the unsaturated fatty acids in breast milk is higher than in cow’s milk. They are important for the development of the nervous system and the brain. They can also be found accumulated in the retina of the eye. The amino acid taurine, which babies cannot produce themselves in sufficient quantities, can be found in breast milk. Taurine has a particularly positive effect on the infant’s organ development and is important for fat digestion.

The mineral content is significantly lower in breast milk than in cow’s milk. The infant has not yet the capacity to excrete the excess minerals through the kidneys. That is why cow’s milk may only be used diluted in infant nutrition. Breast milk contains more vitamins A and E than cow’s milk. Trace elements such as iron, zinc, copper, manganese, but also calcium are bound to specific fractions in breast milk and can be absorbed much more easily than from cow’s milk.

Changes in Breast Milk

Some of the energy and nutrients were already stored during pregnancy and are now accessible for breastfeeding. The hormone prolactin made the breast grow and prepared it for milk production. The newborn should be breastfed immediately after birth, because the sucking stimulus is the trigger for a particularly strong release of prolactin. Thus the milk production really gets going. The colostrum is produced in the first one to three days after the birth. It has a strong yellow color and is very important for the child, as it has a high content of antibodies and thus offers comprehensive protection against infection. We can call it the first vaccination for the newborn.

Breastfeeding right after birth - Photo by Jonathan Borba from Pexels

From around the third day, the transitional milk is formed. It becomes more fluid and whiter. Until mature breast milk is formed, the proportions of fat and carbohydrates increase and the protein content decreases. At the same time, the amount of milk increases. Even during the breastfeeding, the composition is changing. The foremilk, at the beginning of a feeding, is more watery and translucent. The baby should first take in enough fluids. The hindmilk then becomes richer in fat and satisfies hunger. It is therefore important that the mother takes enough time to breastfeed so that the child gets enough of the high-fat milk.

It should always be fed from both breasts. This is how milk production really gets going as a result of the sucking stimulus. In the past, only one breast was applied per meal, with the result that mothers soon stopped breastfeeding for fear that the child was getting too little milk. If the child stubbornly refuses a breast for any reason, one breast can be used exclusively without any problems. The author of this article has successfully experienced this for 15 months with her own child. If the mother is eating wholesome food, the baby does not need anything except breast milk for the first six months of life. Only then you should start slowly introducing complementary foods.

Allergy Protection

Breast milk is the best protection against allergic diseases. In the first few months of life, the intestinal mucous membrane of the infant is much more permeable to protein from the diet than in the adult. When the baby is breastfed, only species-specific protein is absorbed, so no immune reaction is triggered. In bottle-fed infants, alien protein can enter the blood without being broken down, and can lead to an immune reaction in the case of allergic predisposition. Cow’s milk allergies are the most common allergies in infancy. If someone in the family is known to have a cow’s milk allergy, the child should be fully breastfed for at least 6 months.

Baby-Bottle

Industrial Infant Formula

If, for whatever reason, breastfeeding is not possible, industrially produced baby formulas must be used. It is usually offered in powder form. Most formulas are based on proteins from cow’s milk, which have a higer allergic potential. There are soy-based formulas available, who can be allergenic as well. In protein hydrolysate formulas, the proteins are broken down into smaller components, which can reduce their allergy potential. There are some follow-on formulas, which are less adapted to breast milk. They are richer in protein and have a higher mineral content. That is why they should only be fed from the age of 6 – 12 months, depending on their composition.

Problematic Substances in Breast Milk

The possible high concentration of toxic chlorinated hydrocarbons in breast milk can be a disadvantage. Such substances are found in pesticides, but also in plastic products. The mother could have also absorbed them with grilled and cured foods. However, it can be said that the content of such substances in breast milk has been falling steadily since the 1980s, as the danger of such compounds was recognized and some of them were banned. Toxins are stored in the mother’s depot fat. That is why a nursing mother should never flirt with radical weight loss. In any case, the weight usually decreases slowly during breastfeeding.

Other food ingredients can also pass into breast milk. That is why alcohol, black and green tea, soft drinks, energy drinks and coffee should be avoided. Nicotine also passes into milk. You have to experiment with bloating vegetables or fruits that can cause red butts in the nursing babies. It differs from mother to mother and from child to child. Despite such possible contaminations of breast milk, the advantages of breastfeeding predominate, at least in the first six months of life.

Breastfeeding with responsibility - Photo by Jonathan Borba from Pexels

Persevere

Perseverance is the most important advice. Breastfeeding only becomes nice and relaxing after a few days. Breastfeeding stimulates the shrinking of the uterus. This can be very painful in the first few days. The newborn also reports very often at the beginning until a comfortable rhythm is found. Feeding at night is also a nuisance at first. But you soon find a way to make it more comfortable, and some children also manage to sleep through the night, the dream of all mothers. It is very important to get information about breastfeeding before giving birth. The choice of hospital for birth can also determine whether or not breastfeeding is successful. Does the mother get support there and the necessary help with the initial difficulties? Every mother should be encouraged to breastfeed for at least 6 months, because breastfeeding is simply the best start in life.

Filed Under: Babies and Infants, Phases of Life

Why Local Foods are Better for You

March 14, 2021 by Esther Neumann - [rt_reading_time label="Reading Time:" postfix="minutes" postfix_singular="minute"]

Vorteile von Einheimischen Lebensmitteln

Kiwis from New Zealand, tomatoes from Mexico, bananas from Ecuador, grapes from South Africa … Shopping in the supermarket is like immersing yourself in the big wide world. Also, contemplating the variety of fruits and vegetables available, it is hardly possible to tell which season is outside the supermarket. A huge logistic is behind the extensive product range.

Why Local Foods are Better for You

Long Transport Chains

The food supply sometimes requires very long transports and the associated consumption of a lot of energy, not only for transport, but also to cool the goods. In addition, there is the energy and raw material for the production of the packaging material and the many plastic foils used for cultivating vegetables. The transport of food over long distances has increased because of global trade unions.

To reduce these energy expenses, local produce should be given preference. This has many advantages, also for the consumer. Fruits and vegetables can be harvested when they are ripe, since there are only short transport routes. Mature products not only taste better, the nutritional value is also higher.

Tracing Phytochemicals

In recent years, scientists have been following very closely the traces of the so-called phytochemicals in natural produce such as fruits, vegetables, cereals, legumes, herbs and teas. These are substances that the plants produce for their own pest protection and to avoid being eaten. But it also includes coloring and flavoring substances, plant toxins and hormones. In nutritional science, these substances were predominantly referred to as unhealthy and anti-nutrients. Today the tide has turned. Cancer research, in particular, indicates that there is more to be found in fruits and vegetables than minerals and vitamins. More of these valuable ingredients can be found in mature products that are in season and that could grow on organic farming.

Local berries - Photo by Susanne Jutzeler from Pexels

Exotics from Overseas

Overseas fruit is usually harvested unripe. Chemical agents are often used to suppress the natural ripening process, trying to bring the products to the market when they are ready for consumption. Unfortunately, that doesn’t always work. Often the hard, tasteless fruits are just a far reminiscent of the exotic ones that you got to know on your previous vacation. Certainly nothing is wrong with adding some tropical fruits every now and then to the menu. But local products should preferably be served.

Seasonal Fruits and Vegetables

Vegetables from the greenhouse and cultivated in tunnels have higher nitrate contents than vegetables grown in the open because of the lack of sunlight. More pesticides must also be used. Such residues can be reduced with a seasonal diet. In winter and spring, winter hardy vegetables should therefore be preferred: lamb’s lettuce, kale, leek, storable vegetables such as cabbage, carrots, red beets, celery, endive, radicchio, apples and pears. Pumpkins also last well into winter. Let’s also get the first green from the wild, such as dandelions, wild garlic, ground elder, violets and daisies.

Direct Marketing

Marketing directly from the producer to the consumer contributes a lot to securing the livelihood of local small and medium-sized farms. Associated with this is the preservation of the rural landscape and of cultural assets. By shopping from the farm or at the farmers’ market, we can also do a lot to avoid waste. Around half of the volume of household waste is packaging, of which around 90% are food packaging.

Fresh products at the farmers market - Photo by Eva Elijas from Pexels

Products from Organic Farming

Organic farming techniques not only take into account the lower environmental impact, but also results in healthier and better-tasting products. Organic farming offers reasonable alternatives for many problems. Pollution of soil, air, water and food is reduced, besides the superior taste and nutritional value. In addition, the biodiversity is being preserved by cultivating varieties that are not used in large scale commercial production.

Cultivation in the Garden

Growing in your own garden more than pays off – despite the cheap goods at the supermarket. The short way from the garden to the kitchen guarantees freshness and quality. There are also other health benefits: exercise in the fresh air while gardening and the joy of working with the Creator. Growth and prosperity come from him. The gardener sows, cherishes, cares and is looking forward to the harvest.

Fresh veggies from the garden - Photo by Ava Motive from Pexels

Rethink

In this sense, spring offers a good new beginning. Let’s learn to rethink. The comfortable reach on the supermarket shelf is not always the best way. Let’s start with our own garden, let’s plant a few vegetable patches again. Maybe we go out of our way to buy directly at the farm and give preference to local products. Many small steps pave the way to better health and a more intact environment.

Healthy Fruits

Stay Always Up to Date

Sign up to our newsletter and stay always informed with news and tips around your health.

Sign Up Now!

Filed Under: Nutrition

Seven Secrets for Successful Organic Gardening

March 7, 2021 by John Dysinger - [rt_reading_time label="Reading Time:" postfix="minutes" postfix_singular="minute"]

Seven Secrets for Successful Organic Gardening

There are many compelling reasons for growing an organic garden. Rising food prices, economic uncertainty, environmental stewardship, and health concerns regarding conventional produce are just a few. Then there is the fact that God created man to live and work in a garden (Gen. 2:15). God planned to walk with man in the garden every day! Is there any more compelling reason than that? But there is often a big gap between conviction and reality! Many people don’t have the knowledge or confidence needed to get out into the garden.

Seven Secrets for Successful Organic Gardening

The purpose of this article is to give you some practical suggestions for getting started on what we hope will be a lifelong adventure in the garden. The seven secrets we will be looking at are really not secrets at all, just often overlooked or underutilized keys to success. An article of this length cannot begin to do justice to these topics, but hopefully it can stimulate you enough to encourage further study and experimentation.

1) Grow in beds, not rows.

Traditional “row-cropping” makes sense if you are planting and/or cultivating with animals or tractors, but for a home garden you can utilize your space much more efficiently by planting in beds. With beds, there are fewer pathways for weeding, less compaction of soil in your growing area, and greater yields of produce.

We use a 30-inch-wide (80 cm) bed because it is easy to straddle, step, or reach across. The avid gardener and author Eliot Coleman, whose books have inspired a whole new generation of gardeners, has standardized the 30-inch bed-width, and bases all his spacing and amending recommendations on it. He has also designed a number of quality tools suited for this width.

Walking pathways between beds should generally be around usually 12 to 15 inches (30 cm) wide, with NO walking on the beds! Beds can be as long as you need, but 20 feet (7 m) is a nice home-garden length (a standard length makes garden calculations much easier).

We stake out the four corners of our beds with concrete re-bar. Then we slide a piece of PVC pipe over the re-bar to help prevent accidents. Masonry (or builder’s) twine works well to mark the edges of the bed during the bed preparation stage. If your bed area is covered with grass or weeds, a well-sharpened spade can cut around the edges and then be used to skim off the roots and tops (to be used in your compost pile). Or you might prefer to rototill the bed to work in all that good organic matter.

Next, we loosen the soil using a spading fork. Push the fork in as deep as it will go, approximately 12 inches. Try to break up the clods and take out any rocks, but don’t turn over the soil! The goal is to loosen and aerate the soil, while leaving its natural layering intact. Although there are some advantages to “double-digging” or loosening the soil to a depth of two feet deep, there are also some disadvantages—the biggest being the number of people who are discouraged from gardening by trying it! It is hard work, so we recommend that you start by “single-digging,” and you can go deeper later if your time and energy allows. Once the soil is loosened, it can be kept that way by using a wonderfully easy tool called a broadfork once or twice a year.

Loosing the soil with a spade - Photo by Lukas from Pexels

If you have time and patience, you can let nature improve the soil texture of your beds by covering them with nonglossy newspaper three or four sheets thick, and then adding lots of organic mulch on top. Keep the mulch moist but not soggy and let nature do what it does so well— turning dead plant material into rich humus. Continue to add more mulch as the existing organic matter breaks down. Within a year you will have beautiful, crumbly soil.

Many people ask about raised beds. If you live on solid rock, or you have water drainage issues, raised beds may be your only option. They certainly look nice, if done right, and eliminate the need of bending over so far, but they require much more work and expense. Our recommendation is, don’t use them unless you have to. If you do use them, avoid pressure-treated or creosotetreated wood. Try using rocks, cement blocks, logs, cedar, or plastic lumber instead.

2) Feed the soil, not the plant.

Good nutrition for the soil constitutes one of the major differences between conventional and organic agriculture. Organic agriculture focuses on feeding the microorganisms in the soil the raw materials, rock powders and organic matter that they need to thrive. Beneficial microorganisms then, through amazingly complicated and intricate processes, supply the plant with what it needs when it needs it! Conventional agriculture focuses on feeding the plant certain nutrients, such as nitrogen, phosphorus, and potassium (N-P-K). Often the soil is “treated like dirt.” It is much like the difference between eating whole foods in their natural state vs. taking supplements.

Before knowing what to feed the soil, you need to know its condition. This can be ascertained by getting a good soil test. Take a shovel and make a six-inch (15 cm) deep “V” in your garden soil. Then, using your shovel, scrape a slice of soil off one side of the V. Place this dirt in a clean, plastic bucket. Repeat this process 8 to 10 times randomly around your garden plot. Mix all the samples together in your bucket and then put approximately one pound of soil in a ziplock bag or a bag from the soil laboratory. Send the sample off to a reputable lab.

Once you know the conditions of your soil, you can adjust it accordingly with soil amendments. Here are a few suggestions: If you need nitrogen, which most soils do, add plant meals such as alfalfa, soybean, cottonseed, or cornmeal. You can also use fish or feather meals. If your soil is deficient in phosphorus, soft rock phosphate is usually the best choice to add. Potassium can be supplied from greensand, wood ashes, or organic mined potassium sulfate. Lime provides calcium (and magnesium if it is dolomitic lime) and adjusts the pH. Trace minerals can often be adequately supplied by using kelp meal, alfalfa meal, or azomite, which is a rock powder. Sulfur is another element that may be needed.

Organic soil with rainworms - Photo by Sippakorn Yamkasikorn from Pexels

Although we recommend using the amendments just mentioned if you are able, never forget that a good quality compost is the best soil balancer. Compost will raise a low pH and lower a high one. It will provide micronutrients as well as most (if not all) of the major nutrients. In fact, Eliot Coleman asserts that compost making is the most important job on an organic farm! With that in mind, let’s talk a little bit more about what is involved in making compost.

Compost Making

Compost results from the breakdown of organic matter. Organic matter is composed largely of carbon and nitrogen sources. This breakdown works best with adequate temperature, moisture, and air, along with a proper carbon/nitrogen ratio. Controlling these five variables leads to high-quality compost.

Think of a compost pile as a lasagna, with alternating layer of noodles (dry, brown, high-carbon ingredients such as straw, corn stalks, and old tomato vines) and sauce (green, high-nitrogen materials like fresh grass clippings, kitchen scraps, and freshly-pulled weeds). Sprinkling dirt on the green ingredients will help to inoculate the pile with beneficial microorganisms that will facilitate the decomposition process. Keep in mind that the proper ratio requires a lot more carbon than nitrogen. Here are some other points to keep in mind for making good compost:

  • Straw is the perfect brown ingredient. Being hollow, it supplies plenty of air to the pile.
  • The ideal moisture level of the pile should be like a squeezed-out sponge.
  •  If your pile stinks, is mushy, or attracts flies, remake/ rebuild it with more “noodles”/carbon-dense materials (browns).
  •  If your pile is not decomposing, it needs more moisture, air, or “sauce” (green material).
  • You can jump-start an inactive pile by poking holes in it with a bar and pouring in liquid fish-emulsion or molasses (approximately one-half cup per two gallons of water.)
  • The more you turn or aerate your pile, using a pitchfork, the faster it will break down.
  • The ideal pile size is approximately four to six-feet (130 – 200 cm) square. If you go bigger than this, you will need to make holes in the center of the pile for air, or else form your pile into a windrow (four to six feet wide and as long as necessary).
  • Try making your compost container out of straw bales stacked two high on their sides. After a while, the container will become ingredients for the next pile!
  • Keep your pile covered in wet weather to avoid too much moisture.

3) Transplant as much as possible; direct seed as little as possible.

Unless you have had really good weed control in your garden for a number of years, direct seeding is often like throwing your “lambs” (seeds) to the “wolves” (weeds, bugs, etc.)! But there are a few crops that we do recommend for direct seeding:

  • Tap-rooted crops, such as carrots and parsnips,
  •  Low-return-per-square-foot crops such as corn,
  •  Legumes, including beans and peas,
  •  Fast-growing crops, such as radishes and arugula, “Baby” crops planted in high density, such as lettuce.

Direct Seeding

Here are a few suggestions for direct-seeding crops:

  • Plant into a “stale seedbed” to get a head start on the weeds (see next section for more on this).
  • Use string to mark your rows. This makes for easier and earlier cultivation.
  • Expect up to 50 percent of your seeds to fail to germinate. So, if you want a plant every four inches, drop a seed every two inches.
  • As a general-planting rule, cover seeds to three or four times their diameter. For example, plant a one-fourth-inch diameter pea one inch (2,5 cm) deep. In cool or heavy soils, plant the seeds a little shallower. In warm or dry soils, plant slightly deeper.
  • Keep soil moist (not soggy) until germination. This is very important!
Direct Seeding - Foto by kaboompics from Pexels

Transplanting

Now, let’s look at some of the advantages of transplanting. Eliot Coleman says, “A seed sown in the field is a gamble, but a healthy three-to-four-week-old transplant set out in the field provides an almost certain harvest.” That should be reason enough, but there’s more. When you start seeds as transplants, you have much better control over the factors affecting germination and plant growth, such as temperature, light, moisture, fertility, and others. In addition, transplanting can lengthen your growing season and thus utilize your garden area much more efficiently. For example, when you finish harvesting your springtime carrots, you can have three- or four-week old squash plants ready to plant immediately—effectively adding those three or four weeks to your season!

Additional advantages include giving you a BIG jump on weed control. With transplants, you can be cultivating and weeding immediately, whereas with direct seeding, you may need to wait two or three weeks before your seedlings have emerged. Then, there is no need for thinning and you don’t have large empty spaces where seeds didn’t germinate well. Finally (and obviously), transplanted crops will mature earlier than direct-seeded crops. You can buy transplants, but price, quality, and limited selection and availability are all good reasons to grow your own.

Transplants in a seed container

Starting transplants is not difficult. If you follow the suggestions outlined below, you should have success from the start:

  • Although there are many different kinds of containers for starting seeds, all of which work, our favorite method is soil blocks, which use no container at all. You can use a metal mold to press out neat little blocks of soil with a hole in the top ready for seeding. Soil block-makers are available from Johnny’s Selected Seeds (www.johnnyseeds.com) and Peaceful Valley Farm Supply (www.groworganic.com).
  • We recommend using a peat-based “soilless potting mix.” This ensures less chance of soil-borne diseases killing your seedlings. For small-scale gardening purposes, you can buy a premixed bag at the hardware store or nursery. If you are growing on a larger scale, you might find making your own mix a good option. Here is the very simple recipe that we have been using for years:
  • 3 buckets peat moss (Note: 1 “bucket” = 2 gallons / 8 liters)
  • 3 buckets high-quality compost
  • 1 bucket perlite
  • 2 cups fertilizer mix (equal parts soybean meal or other high-nitrogen fertilizer, greensand, and softrock phosphate)
  • Transplants can be grown indoors using cheap “shoplight” fluorescent fixtures. You don’t even need special “grow light”-bulbs. Just keep the fluorescent lights as close to the plants as possible, without actually touching them. Raise the lights as the plants grow. Don’t rely solely on a sunny window! Even southfacing windows will produce leggy plants.
  • Most seeds germinate best between 70 and 80 degrees Fahrenheit (21 – 26°C).
  • Use bottom-heat mats under trays of germinating warmweather crops, such as tomatoes, peppers, and eggplant.
  • Only water when the soil is beginning to dry out. Overwatering probably kills more transplants than any other cause!

4) Cultivate; don’t weed.

When organic farmers are surveyed as to what their biggest challenges are, weeds top the list! Let’s allow Eliot Coleman to define our terms: “Cultivation is the shallow stirring of the surface soil in order to cut off small weeds and prevent the appearance of new ones. Weeding takes place after the weeds have already been established.” Another way to state it is that cultivation prevents weeding. If you wait until the garden starts to look weedy, you’ve waited too long! Ideally, the soil should be cultivated (gently stirred) before weeds are even visible. It works this way with character, too! Here are some suggestions to help you win the war on weeds:

  • Try the “stale-seedbed” method.
    • Prepare your garden bed for planting one week or more ahead of time.
    • Water to encourage weed germination.
    • Use very shallow cultivation, or better yet, when appropriate, a propane torch to flame the bed just before planting.
    • Repeat the watering, germination, and dispatching/cultivation of weeds if you have time. This will eliminate 80 percent or more of your weeds before you even plant!
  • Try to work the soil in a way that will not continue to bring up weed seeds from the soil’s weed-seed storehouse. In other words, don’t turn the soil over.
  •  Ideally, cultivate in the morning on hot, dry days.
  • NEVER let weeds go to seed. “One year’s seeding is seven year’s weeding!” If you are unable to keep the weeds under control, use a weed-eater or mower to at least cut them down before their seeds mature.
  • Vigorous cover crops, or “smother crops,” sown and tilled at various times of the year will out-compete weeds, and thus decrease their seed count in the soil.

Using the right tools makes cultivation so much more efficient and enjoyable. Our favorites are the collinear and stirrup hoes (both available from Johnny’s Selected Seeds).

5) Cover the soil; don’t leave it bare.

Although we all love the look of a garden with beautiful rows of healthy plants and soft, bare soil in between, it is not natural. All nature is designed to clothe “naked soil.” You will be battling the forces of nature to keep it bare, and sooner or later you will lose! So, why not work with nature to clothe the soil? It will be healthier and you will be happier!

After your initial seeding or transplanting, you will need to cultivate for four or five weeks (at least three cultivations) to help your crop get well-established without weed competition. Then it’s time to cover the soil. Here are some tips:

  • Mulch with organic material thick enough to keep weeds from germinating; straw, old hay, chopped leaves, and grass clippings are a few options. This is a great way to build your soil fertility, retain soil moisture, and reduce weed growth all at the same time. There are some downsides, however. In wet or cold weather, mulching can cause problems. It can also be a lot of work and/or money to come up with enough organic material to keep a thick mulch on the soil, since it will continually be breaking down and may need to be reapplied.
  • Plant your crops close enough to shade out weeds. If you follow good plant-spacing recommendations, the plant canopy will close and keep all but the hardiest weeds from flourishing. Then all you have to worry about is keeping the walkways clear. Some plants, like sweet potatoes and winter squash, will do a very good job of covering everything—even areas that you don’t want covered!
  • Plastic or woven landscape fabric is another option for keeping the soil covered. Again, some disadvantages are involved, such as the cost of materials, the effort required to lay it down and then remove it at the end of the season, and disposal issues, so we only use such coverings when no other option seems to be more effective. For example, it has been our experience that strawberry plants grown in raised, plastic-covered beds do better than by any other method we have tried.
  • The most exciting option for weed block that we have found is undersowing cover crops or “green manure” in beds and pathways. If it is done right, you will have beauty, weed suppression, and increased soil fertility—all with very little effort. We are still perfecting this process, but two combinations that have proven successful are the undersowing of your fall cole crops with crimson clover, and undersowing corn with soybeans or cowpeas. Just give your main crop about a four-week head start before undersowing the cover crop.
  • Don’t forget to keep the soil covered even when your garden is finished for the season. For example, sow a winter cover crop of grain or legumes. Cover cropping is probably the easiest and best way to build soil fertility. Here are a few of the benefits:
    •  It is often the easiest and least expensive way to add organic matter to your garden.
    •  It adds nitrogen and builds humus in the soil.
    •  It prevents soil erosion.
    •  It captures plant nutrients that otherwise might leach away.
    •  It stimulates biological activity in the soil.
    •  It often works as a biological subsoiler, breaking up hard soils.
    •  It improves soil structure and drought-resistance.
    • And, as already mentioned, it can smother weeds.
    • A few tried-and-true cover crops include:
      •  For winter, cereal rye, wheat, crimson clover, and hairy vetch.
      •  For summer, cowpeas, soybeans, millet, buckwheat, and sorghum/sudangrass.

6) Be “plant positive” rather than “pest negative.”

Fresh Organic Lettuce

The best insect control is a healthy soil that produces healthy plants—just like the best disease prevention in humans is a healthy body. Insect pests are indicators of stressed or unhealthy plants. Don’t “kill the messenger” until you have heard the message. Then, invest in the solution, such as building healthy soil, rather than getting rid of the symptoms, the insects. Although it may sound too simplistic, it really does work! But healthy soil is often not built in a day, so here are a few suggestions for intermediary treatment:

  •  Learn the life-cycle of insects and outsmart them. For example, in our area Colorado potato beetles are not a problem after July 4th, so we can plant a fall crop of potatoes, beetle-free!
  • Use crop rotations to minimize insect and disease issues. Due to space constraints, this article cannot adequately address crop rotation here, but the basic purpose of this useful gardening practice is to try to separate plant families by time and distance.
  • Use lightweight floating rowcovers, which serve as physical barriers, to protect young plants.
  • Use the organic insecticides dipel or spinosad for worms on brassicas.
  • Use insecticidal soap on aphids. But before applying, just try watering a little more. Aphids are attracted to plants that are either water-stressed or nitrogen-rich.
  • Try succession plantings of summer squash to keep squash bugs under control. In other words, start some new plants each month until about three months before fall frost.
  • Don’t be too hasty in applying insecticide because your plants have a few holes in the leaves! Plants can handle a fair amount of insect damage without their yield being significantly affected.

7) Make gardening a lifestyle rather than an event.

Enjoying Gardening - Photo by cottonbro from Pexels

For most gardeners, “putting in a garden” is something you do on one or two nice days in the spring. But, how about making it a way of life? We now grow year round with very simple methods. You can too! Eliot Coleman, who has pioneered awakened interest in year-round growing, lives in Maine! No, we don’t grow tomatoes in the winter or lettuce in the summer, but there are plants suitable for every season! Below are some ideas to get you started on the journey to season extension:

  • Use succession plantings to extend your season on both ends. For example: Most tomatoes in our area are set out in late April/early May. But you can plant tomatoes as early as late March by covering them with floating row cover and/or plastic. You can also set out tomatoes as late as the first of July and have fruit until frost.
  • Plant less more often. How many zucchini plants do you really need at one time? Planting a few plants each month through July can provide a steady supply of fresh zucchini without being inundated!
  •  Learn what crops can survive cold weather in your area. Many of the “greens,” such as spinach, kale, and collards, are very winter-hardy. Root crops can often be left in the ground, mulched with straw for protection.
  • Use floating row covers draped over wire hoops. You will be amazed at how much protection such a flimsy fabric provides!
  •  For overwintering crops, you can make simple “low tunnels” with galvanized conduit (see Johnny’s Selected Seed catalog for details). Put row-cover and/ or plastic over the tunnels for growing produce all winter long! Hold covers down with sand bags.
  • By eating with the seasons, you will find you don’t need to do as much canning. Why eat from a can when you can eat straight from your garden?!

Well, the seven “secrets” are now “out of the bag.” We have covered a lot of information in this article and you are probably feeling either energized or overwhelmed! But don’t despair—start where you are! Then make improvements as time and money allow. Plants can handle an amazing amount of abuse and still produce beautiful fruit! So, get up, go outside, and walk with God in the garden!


This article was published originally in the Journal of Health and Healing, a publication of Wildwood Institute.

Some news! Paul and Edwin Dysinger have launched the development of a revolutionary app called Seedtime. It makes all the gardening planning extremely easy, plus it will give you instructions on how to do your organic garden on every step. If you wish, you can get access to the famous Born to Grow Gardening Library as well.

Tell me everything about Seedtime!

Filed Under: Gardening

Primary Sidebar

Social Channels

Coronavirus Immunity Challenge

Boost your immune system to be bullet-proof for the pandemic.

I Want to Participate

Recent Posts

  • 5 Habits to Live Longer
  • Better Sleep Can Protect Against Dementia
  • Finding Peace In Your Crazy-Busy World
  • Flaxseed – An Ancient Plant Rediscovered
  • Platelets – Triggers for Life or Death
  • Boderline Personality Disorder
  • In Praise of Almonds and Nuts
  • Are You Stuck in the Clutter Trap?

Categories

  • Body Systems (16)
    • Cell Function (2)
    • Circulatory System (1)
    • Digestive Tract (10)
    • Immune System (4)
  • Diseases (27)
    • Cancer (2)
    • Cold (1)
    • COVID-19 (11)
    • Dementia (1)
    • Diabetes (1)
    • Digestive Diseases (2)
    • Heart Disease (2)
    • Kidneys (1)
    • Metabolic Syndrome (2)
    • Skin (1)
  • Healthy Lifestyle (42)
    • Exercise (11)
    • Gardening (2)
    • Sleep (7)
    • Sunlight (2)
    • Temperance (14)
    • Water (4)
  • Mental Health (87)
    • Addictions (6)
    • Anxiety (7)
    • Burnout (1)
    • Depression (7)
    • Psychosomatic Diseases (6)
    • Stress Management (45)
    • Trust (6)
  • Nutrition (56)
  • Obesity (9)
  • Phases of Life (14)
    • Adults (3)
    • Babies and Infants (1)
    • Children (3)
    • Seniors (5)
    • Teenagers (3)
  • Therapies (7)
    • Herbs (5)
    • Hydrotherapy (1)
  • Uncategorized (3)

Archives

  • January 2025 (1)
  • March 2024 (5)
  • February 2024 (4)
  • January 2024 (4)
  • December 2023 (5)
  • November 2023 (4)
  • October 2023 (5)
  • September 2023 (4)
  • August 2023 (3)
  • July 2023 (2)
  • June 2023 (4)
  • May 2023 (4)
  • April 2023 (5)
  • March 2023 (4)
  • February 2023 (4)
  • January 2023 (4)
  • December 2022 (4)
  • November 2022 (4)
  • October 2022 (5)
  • September 2022 (4)
  • August 2022 (4)
  • July 2022 (5)
  • June 2022 (4)
  • May 2022 (5)
  • April 2022 (4)
  • March 2022 (4)
  • February 2022 (4)
  • January 2022 (5)
  • December 2021 (3)
  • November 2021 (4)
  • October 2021 (6)
  • September 2021 (4)
  • August 2021 (4)
  • July 2021 (5)
  • June 2021 (4)
  • May 2021 (3)
  • April 2021 (5)
  • March 2021 (4)
  • February 2021 (4)
  • January 2021 (5)
  • December 2020 (3)
  • November 2020 (4)
  • October 2020 (5)
  • September 2020 (5)
  • August 2020 (3)
  • July 2020 (1)
  • June 2020 (1)
  • May 2020 (1)
  • April 2020 (1)
  • March 2020 (1)

Copyright © 2026 · Abundant Health - Privacy Policy - Medical Disclaimer